Tuesday, December 30, 2008

Brush presets

Brush presets 

A preset brush is a saved brush tip with defined characteristics, such as size, shape, and hardness. You can save preset brushes with the characteristics you use often. You can also save tool presets for the Brush tool that you can select from the Tool Preset menu in the options bar.

When you change the size, shape, or hardness of a preset brush, the change is temporary. The next time you choose that preset, the brush uses its original settings. To make your changes permanent, you need to create a new preset. See Create a new preset brush.

Select a preset brush

  1. Select a painting tool or editing tool, and click the Brush Preset pop‑up menu in the options bar.
  2. Select a brush.
    Note: You can also select a brush from the Brushes palette. Be sure that Brush Presets on the left side of the palette is selected to view the loaded presets.
  3. Change options for the preset brush.
    Diameter
    Temporarily changes the brush size. Drag the slider or enter a value. If the brush has a dual tip, both the primary and dual brush tips are scaled.

    Use Sample Size
    Uses the original diameter of the brush tip if the brush tip shape is based on a sample. (Not available for round brushes.)

    Hardness
    Temporarily changes the amount of anti-aliasing for the brush tool. At 100%, the brush tool paints with the hardest brush tip, but is still anti-aliased. The Pencil always paints a hard edge that is not anti-aliased.


Change how preset brushes are displayed 

Choose a display option from the Brush Preset picker menu  or Brushes palette menu: 

  • Text Only to view the brushes as a list. 
  • Small or Large Thumbnail to view the brushes as thumbnails. 
  • Small or Large List to view the brushes as a list with thumbnails. 
  • Stroke Thumbnail to view a sample brush stroke with each brush thumbnail. 
To dynamically preview brush strokes in the Brushes palette, make sure that Brush Preset is selected, and then position the pointer over a brush until the tool tip appears. Move the pointer over different brushes. The preview area at the bottom of the palette will display sample brush strokes.
 
Load, save, and manage brush presets 

You can manage libraries of preset brushes to keep your brushes organized and to make available only the brushes you need for a project.

Change the preset brushes displayed in the palette
  1. To load a library of preset brushes, choose one of the following from the Brush Preset picker menu or Brushes palette menu:
  • Load Brushes to add a library to the current list. Select the library file you want to use, and click Load.
  • Replace Brushes to replace the current list with a different library. Select the library file you want to use, and click Load.A library file (displayed at the bottom of the palette menu). Click OK to replace the current list, or click Append to append the current list.
  1.  To return to the default library of preset brushes, choose Reset Brushes from the Brush Preset picker menu or Brushes palette menu. You can either replace the current list or append the default library to the current list. 
Note: You can also use the Preset Manager to load and reset brush libraries. 

Save a set of preset brushes as a library
  1. Choose Save Brushes from the Brush Preset picker menu or Brushes palette menu. 
  2. Choose a location for the brush library, enter a file name, and click Save. You can save the library anywhere. However, if you place the library file in the Presets/Brushes folder in the default preset location, the library name will appear at the bottom of the Brush Preset picker menu and Brushes palette menu after you restart Photoshop.You can also use the Preset Manager to rename, delete, and save libraries of preset brushes. For more information, see Work with the Preset Manager.

Rename a preset brush

Do one of the following:
  • Select a brush in the Brush Preset picker or Brushes palette, and choose Rename Brush from the palette menu. Enter a new name for the brush, and click OK. 
  • If the Brushes palette is set to display brushes as thumbnails, double-click a brush, enter a new name, and click OK. 
  • If the Brushes palette is set to display brushes as a list or text only, double-click a brush, enter a new name inline, and press Enter (Windows) or Return (Mac OS). 
Delete a preset brush
  • In the Brush Preset picker or Brushes palette, select a brush, and choose Delete Brush from the palette menu. 
  • In the Brush Preset picker or Brushes palette, Alt-click (Windows) or Option-click (Mac OS) the brush you want to delete. 
  • In the Brushes palette, select a brush and click the Delete icon , or drag a brush to the Delete icon. 
Create a new preset brush
 
You can save a customized brush as a preset brush that appears in the Brushes palette, Brush Preset picker, and Preset Manager. 

Note: New preset brushes are saved in a Preferences file. If this file is deleted or damaged, or if you reset brushes to the default library, the new presets will be lost. To permanently save new preset brushes, save them in a library. 
  1. Customize a brush. 
  2. Do one of the following in the Brushes palette or Brush Preset picker:
  • Choose New Brush Preset from the palette menu, enter a name for the preset brush, and click OK.
  • Click the Create New Brush button 


Painting tools

About painting tools, options, and palettes 

Adobe Photoshop CS3 provides several tools for painting and editing image color. The Brush tool and the Pencil tool work like traditional drawing tools by applying color with brush strokes. The Gradient tool, Fill command, and Paint Bucket tool apply color to large areas. Tools like the Eraser tool, Blur tool, and Smudge tool modify the existing colors in the image. See Painting tools gallery.

In the options bar for each tool, you can set how color is applied to an image and choose from preset brush tips.

Brush and tool presets

You can save a set of brush options as a preset so you can quickly access brush characteristics you use frequently. Photoshop includes several sample brush presets. You can start with these presets and modify them to produce new effects. Many original brush presets are available for download on the web.

You choose presets from the Brush Preset picker, which stores preset brushes and allows you to temporarily modify the diameter and hardness of a brush preset.

Learn the shortcuts for changing paint tool size and hardness. See Keys for painting objects.
You use tool presets when you want to save brush tip characteristics along with settings from the options bar, such as opacity, flow, and color. To learn more about tool presets, see Create and use tool presets.

Brush tip options

Along with settings in the options bar, brush tip options control how color is applied. You can apply color gradually, with soft edges, with large brush strokes, with various brush dynamics, with different blending properties, and with brushes of different shapes. You can apply a texture with your brush strokes to simulate painting on canvas or art papers. You can also simulate spraying paint with an airbrush. You use the Brushes palette to set brush tip options. See Brushes palette overview.

If you work with a drawing tablet, you can control how color is applied using pen pressure, angle, rotation, or a stylus wheel. You set options for drawing tablets in the Brushes palette.

Paint with the Brush tool or Pencil tool
 
The Brush tool and the Pencil tool paint the current foreground color on an image. The Brush tool creates soft strokes of color. The Pencil tool creates hard-edged lines.

  1. Choose a foreground color. (See Choose colors in the toolbox.) 
  2. Select the Brush tool  or Pencil tool . 
  3. Choose a brush from the Brush Presets picker. See Select a preset brush. 
  4. Set tool options for mode, opacity, and so on, in the options bar. See Paint tool options. 
  5. Do one or more of the following:
  • Drag in the image to paint. 

  • To draw a straight line, click a starting point in the image. Then hold down Shift, and click an ending point.

  • When using the Brush tool as an airbrush, hold down the mouse button without dragging to build up color. 
Paint tool options 
Set the following options for painting tools in the options bar. Options available vary with each tool.

Mode  Sets the method for blending the color you paint with the underlying existing pixels. Available modes change with the currently selected tool. Paint modes are similar to layer blending modes. See List of blending modes. 

Opacity  Sets the transparency of color you apply. As you paint over an area, the opacity will not exceed the set level no matter how many times you move the pointer over the area, until you release the mouse button. If you stroke over the area again, you will apply additional color, equivalent to the set opacity. Opacity of 100 percent is opaque. 

Flow Sets the rate at which color is applied as you move the pointer over an area. As you paint over an area, keeping the mouse button down, the amount of color will build up based on the flow rate, up to the opacity setting. For example, if you set the opacity to 33% and the flow to 33%, each time you move over an area, its color moves 33% towards the brush color. The total will not exceed 33% opacity unless you release the mouse button and stroke over the area again. 
Press a number key to set a tool’s opacity in multiples of 10% (pressing 1 sets it to 10%; pressing 0 sets it to 100%). Use Shift and number key to set Flow.

Airbrush   Simulates painting with an airbrush. As you move the pointer over an area, paint builds up as you hold down the mouse button. Brush hardness, opacity, and flow options control how fast and how much the paint is applied. Click the button to turn this option on or off. 

Auto erase  (Pencil tool only) Paints the background color over areas containing the foreground color. Select the foreground color you want to erase and the background color you want to change to. (See Auto Erase with the Pencil tool.) 

Paint with a pattern 

The Pattern Stamp tool paints with a pattern. You can select a pattern from the pattern libraries or create your own patterns.

  1. Select the Pattern Stamp tool . 
  2. Choose a brush from the Brush Presets picker. See Select a preset brush.) 
  3. Set tool options for mode, opacity, etc. in the options bar. See Paint tool options. 
  4. Select Aligned in the options bar to maintain the pattern’s continuity with your original start point, even if you release the mouse button and then continue painting. Deselect Aligned to restart the pattern each time you stop and start painting. 
  5. Select a pattern from the Pattern pop‑up palette in the options bar. 
  6. If you’d like to apply the pattern with an impressionistic effect, select Impressionist. 
  7. Drag in the image to paint it with the pattern. 
Paint with the Art History Brush 

The Art History Brush tool paints with stylized strokes, using the source data from a specified history state or snapshot. By experimenting with different paint style, size, and tolerance options, you can simulate the texture of painting with different colors and artistic styles.

Like the History Brush tool, the Art History Brush tool uses a specified history state or snapshot as the source data. The History Brush tool, however, paints by recreating the specified source data, while the Art History Brush tool uses that data along with the options you set to create different colors and artistic styles

Erase with the Eraser tool 

The Eraser tool changes pixels to either the background color or to transparent. If you’re working in the background or in a layer with transparency locked, the pixels change to the background color; otherwise, the pixels are erased to transparency. 

You can also use the eraser to return the affected area to a state selected in the History palette.

  1. Select the Eraser tool . 
  2. Set the background color you want to apply if you are erasing in the background or a layer with locked transparency. 
  3. Choose a mode for the eraser. Brush and Pencil set the eraser to act like those tools. Block is a hard-edged, fixed-sized square with no options for changing the opacity or flow. 
  4. For Brush and Pencil modes, choose a brush, and set Opacity and Flow in the options bar. An opacity of 100% erases pixels completely. A lower opacity erases pixels partially. See Paint tool options.
  5. To erase to a saved state or snapshot of the image, click the left column of the state or snapshot in the History palette, and then select Erase To History in the options bar. (Photoshop) To temporarily use the Eraser tool in Erase to History mode, hold down Alt (Windows) or Option (Mac OS) as you drag in the image.
  6. Drag through the area you want to erase. 

Change similar pixels with the Magic Eraser tool 

When you click in a layer with the Magic Eraser tool, the tool changes all similar pixels to transparent. If you’re working in a layer with locked transparency, the pixels change to the background color. If you click in the background, it is converted to a layer and all similar pixels change to transparent.

You can choose to erase contiguous pixels only or all similar pixels on the current layer.

  1. Select the Magic Eraser tool . 
  2. Do the following in the options bar:
  • Enter a tolerance value to define the range of colors that can be erased. A low tolerance erases pixels within a range of color values very similar to the pixel you click. A high tolerance erases pixels within a broader range.
  • Select Anti-aliased to smooth the edges of the area you erase.
  • Select Contiguous to erase only pixels contiguous to the one you click, or deselect to erase all similar pixels in the image.
  • Select Sample All Layers to sample the erased color using combined data from all visible layers.
  • Specify an opacity to define the strength of the erasure. An opacity of 100% erases pixels completely. A lower opacity erases pixels partially
   Click in the part of the layer you want to erase. 

Change pixels to transparent with the Background Eraser tool 

The Background Eraser tool erases pixels on a layer to transparency as you drag; this allows you to erase the background while maintaining the edges of an object in the foreground. By specifying different sampling and tolerance options, you can control the range of the transparency and the sharpness of the boundaries. 

  •  If you want to erase the background of an object with intricate or wispy edges, use the Extract command. 
The background eraser samples the color in the center of the brush, also called the hot spot, and deletes that color wherever it appears inside the brush. It also performs color extraction at the edges of any foreground objects, so that color halos are not visible if the foreground object is later pasted into another image.

Note: The background eraser overrides the lock transparency setting of a layer.
  1. In the Layers palette, select the layer containing the areas you want to erase. 
  2. Select the Background Eraser tool . 
  3. Click the brush sample in the options bar, and set brush options in the pop‑up palette:
  • Choose settings for the Diameter, Hardness, Spacing, Angle, and Roundness options (see Brush tip shape options). 
  • If you’re using a pressure-sensitive digitizing tablet, choose options from the Size and Tolerance menus to vary the size and tolerance of the background eraser over the course of a stroke. Choose Pen Pressure to base the variation on the pen pressure. Choose Stylus Wheel to base the variation on the position of the pen thumbwheel. Choose Off if you don’t want to vary the size or tolerance.
  1. Do the following in the options bar:
  • Choose a Limits mode for erasing: Discontiguous to erase the sampled color wherever it occurs under the brush; Contiguous to erase areas that contain the sampled color and are connected to one another; and Find Edges to erase connected areas containing the sampled color while better preserving the sharpness of shape edges.
  • For Tolerance, enter a value or drag the slider. A low tolerance limits erasure to areas that are very similar to the sampled color. A high tolerance erases a broader range of colors.
  • Select Protect Foreground Color to prevent the erasure of areas that match the foreground color in the toolbox.
  • Choose a Sampling option: Continuous to sample colors continuously as you drag; Once to erase only areas containing the color you first click; and Background Swatch to erase only areas containing the current background color.
  1. Drag through the area you want to erase. The Background Eraser tool pointer appears as a brush shape with a cross hair indicating the tool’s hot spot.   
Auto Erase with the Pencil tool 
The Auto Erase option for the Pencil tool lets you paint the background color over areas containing the foreground color.

  1. Specify foreground and background colors. 
  2. Select the Pencil tool . 
  3. Select Auto Erase in the options bar. 
  4. Drag over the image. 
  5. If the center of the cursor is over the foreground color when you begin dragging, the area is erased to the background color. If the center of the cursor is over an area that doesn’t contain the foreground color when you begin dragging, the area is painted with the foreground color. 
Changing the brush cursor 
The painting tools have three possible cursors: the standard cursor (the icon from the toolbox), a cross hair , and a cursor that matches the size and shape of the currently selected brush tip. You change the brush tip cursor in the Cursors preferences dialog box.

  1. Choose Edit > Preferences > Cursors (Windows) or Photoshop > Preferences > Cursors (Mac OS). 
  2. Select the desired cursors in both the Painting Cursors area and the Other Cursors area. The sample cursors change to reflect your choices. For a Brush Tip cursor, choose a size and whether to include a cross hair in the cursor.
  • Normal Brush Tip restricts the cursor size to areas of the brush stroke that have 50% or more opacity. 

  • Full Size Brush Tip sizes the cursor to the entire area affected by the brush stroke. For soft brushes, this produces a larger cursor size than the Normal setting, to include the areas of the brush stroke with lighter opacity.
  1. Click OK. 
  • For the Pen and Brush tools, the Caps Lock key acts like a toggle for changing between the standard cursor and the cross hair.


Selecting


About selecting pixels 

A selection isolates one or more parts of your image. By selecting specific areas, you can edit and apply effects and filters to portions of your image while leaving the unselected areas untouched.

Photoshop provides separate sets of tools to make selections of raster and vector data. For example, to select pixels, you can use the marquee tools or the lasso tools. You can use commands in the Select menu to select all pixels, to deselect, or to reselect. 

To select vector data, you can use the pen or shape tools, which produce precise outlines called paths. You can convert paths to selections or convert selections to paths. 

Selections can be copied, moved, and pasted, or saved and stored in an alpha channel. Alpha channels store selections as grayscale images called masks. A mask is like the inverse of a selection: it covers the unselected part of the image and protects it from any editing or manipulations you apply. You can convert a stored mask back into a selection by loading the alpha channel into an image.
 
Select, deselect, and reselect pixels 

You can select all visible pixels on a layer or deselect any selected pixels. 

 If a tool is not working as expected, you may have a hidden selection. Use the Deselect command and try the tool again.
Select all pixels on a layer within the canvas boundaries
  1. Select the layer in the Layers palette. 
  2. Choose Select > All. 
Deselect selections

  Do one of the following:
  • Choose Select > Deselect.
If you are using the Rectangle Marquee tool, the Elliptical Marquee tool, or the Lasso tool, click anywhere in the image outside the selected area          

Select with the Lasso tool 

The Lasso tool is useful for drawing freeform segments of a selection border. 

  1. Select the Lasso tool , and select options. 
  2. Drag to draw a freehand selection border. 
  3. Specify one of the selection options in the options bar. 
  4. (Optional) set feathering and anti-aliasing in the options bar. See Soften the edges of selections. 
  5. To draw a straight-edged selection border when no other pixels are selected, press Alt (Windows) or Option (Mac OS), and click where segments should begin and end. You can switch between drawing freehand and straight-edged segments. 
  6. To erase recently drawn segments, hold down the Delete key until you’ve erased the fastening points for the desired segment. 
  7. To close the selection border, release the mouse without holding down Alt (Windows) or Option (Mac OS). 
  8. (Optional) Click Refine Edge to further adjust the selection boundary or view the selection against different backgrounds or as a mask. See Refine selection edges.                                                            

Monday, December 29, 2008

Layer Basics


About layers 


Photoshop layers are like sheets of stacked acetate. You can see through transparent areas of a layer to the layers below. You move a layer to position the content on the layer, like sliding a sheet of acetate in a stack. You can also change the opacity of a layer to make content partially transparent.


Transparent areas on a layer let you see layers below.


You use layers to perform tasks such as compositing multiple images, adding text to an image, or adding vector graphic shapes. You can apply a layer style to add a special effect such as a drop shadow or a glow. 

Work nondestructively

Sometimes layers don’t contain any apparent content. For example, an adjustment layer holds color or tonal adjustments that affect the layers below it. Rather than edit image pixels directly, you can edit an adjustment layer and leave the underlying pixels unchanged.

A special type of layer, called a Smart Object, contains one or more layers of content. You can transform (scale, skew, or reshape) a Smart Object without directly editing image pixels. Or, you can edit the Smart Object as a separate image even after placing it in a Photoshop image. Smart Objects can also contain smart filter effects, which allow you to apply filters nondestructively to images so that you can later tweak or remove the filter effect. See Nondestructive editing.

Organize layers

A new image has a single layer. The number of additional layers, layer effects, and layer sets you can add to an image is limited only by your computer’s memory. 

You work with layers in the Layers palette. Layer groups help you organize and manage layers. You can use groups to arrange your layers in a logical order and to reduce clutter in the Layers palette. You can nest groups within other groups. You can also use groups to apply attributes and masks to multiple layers simultaneously.

Video layers

You can use video layers to add video to an image. After importing a video clip into an image as a video layer or a smart object, you can mask the layer, transform it, apply layer effects, paint on individual frames, or rasterize an individual frame and convert it to a standard layer. Use the Timeline palette to play the video within the image or to access individual frames. See Supported video and image sequence formats (Photoshop Extended).

Layers palette overview
 

The Layers palette lists all layers, layer groups, and layer effects in an image. You can use the Layers palette to show and hide layers, create new layers, and work with groups of layers. You can access additional commands and options in the Layers palette menu. 


Photoshop Layers palette


A. Layers palette menu
B. Layer Group
C. Layer
D. Expand/Collapse Layer effects
E. Layer effect
F. Layer thumbnail

Display the Layers palette
  •  Choose Window > Layers.
Choose a command from the Layers palette menu
  •  Click the triangle in the upper right corner of the palette.
Change the size of layer thumbnails
  •  Choose Palette Options from the Layers palette menu, and select a thumbnail size.
Change thumbnail contents
  •  Choose Palette Options from the Layers palette menu, and select Entire Document to display the contents of the entire document. Select Layer Bounds to restrict the thumbnail to the object’s pixels on the layer. Turn off thumbnails to improve performance and save monitor space.
Expand and collapse groups
  •  Click the triangle to the left of a group folder. See View layers and groups within a group.

BASICS


Lightening Underexposed Images  

This isn't a trick; it's the most common adjustment I do. This works in every version of Photoshop and with every kind of file: RAW, JPG and everything.

If you're unsure of an exposure it's better to underexpose a digital camera and correct it later. This is perfect for shooting JPGs. This process is much easier and gives the same results as shooting RAW.

We do this in a few different ways.

LEVELS COMMAND

Go to the LEVELS adjustment either by IMAGE > ADJUSTMENTS > LEVELS or simply command + L.

You'll see a histogram; which is a graph charting the relative amounts of light and dark in your image. You'll see that it doesn't make it all the way to the right of the space in which it sits. Click and drag the little white slider on the far right of the histogram to the left, just enough to meet the rightmost edge of the histogram. As you drag it make sure PREVIEW is checked and you can see what you're doing. Hit OK and you're DONE!

Hold the OPTION key on Mac while doing this and the image will go to super-high contrast. Drag the white slider left until some points just start to sparkle out of the black background. Take your finger off the Option key to see how the image really looks.

CURVES COMMAND

This is a little more complex. This is better if you have an image with bright highlights and want to bring up the shadows in exchange for flattening the highlights a little. (see also Brightening Dark Shadows.) Deliberately underexposing a digital camera in contrasty light and then doing this actually improves the image over a conventional exposure, because it gives you the ability to create a shoulder for the highlights that's missing in digital cameras.

Call up curves by IMAGE > ADJUSTMENTS > CURVES or simply command + M.

Put the cursor on the lower middle of the diagonal line. Click and hold it and drag it up. Have fun, you can do an awful lot here.

Lighten and Darken   

DON'T use the Lighten and Darken commands.

Instead, use the Levels command, IMAGE > ADJUST > LEVELS (or use Command + L on the Mac).

To lighten and darken areas that are well exposed but just don't look right yet, first try dragging the middle gray triangle back and forth. Just do it till it looks right: this is art and not science.

You also can use the Curves command (IMAGE > ADJUST > CURVES or Command + M on Mac), which is more complex. See any Photoshop book for this.

Ignore the "Auto Levels" command, it rarely give good results.

Burning and Dodging   

DON'T use the burn and dodge tools!

Instead, use any of the selection tools to select the area you want to burn or dodge and then do as above to lighten or darken that area.

You can learn how to make a selection at your community college, the online help, the internet or a book. You learn what to select and what to do with that selection from art class and following your soul.

Feather the selection (SELECT > FEATHER) so that you don't have obvious hard edges to the altered area. Try a feather value of 2 to 10 pixels for the manipulation of a precisely defined area and try 100 to 250 pixels for a general adjustment to a non-specific broad area. Of course these values depend on the pixel size of your image and art. I always have my rulers set to read in pixels and I eyeball what the feather should be.

Correcting Color Casts and White Balance Problems  

This works in every version of Photoshop. It works with every kind of image, RAW, JPG or whatever. I'll cover three different tools, all of which do the same thing differently. These tools are the Color Match tool, the Levels tool and the Color Balance tool. All these tools are in every Photoshop version made in the past 10 years or so, but the Color Match tool has only been around a few years.

COLOR BALANCE TOOL


Go to IMAGE > ADJUSTMENTS > COLOR BALANCE or simply command + B.

Move the sliders.

I usually like things warmer than most people shoot them, so I tent to slide them towards Red and Yellow. This is how you change the color temperature or white balance setting of any image, even JPGs. Also wiggle the Magenta/Green slider to correct for fluorescent lights.

LEVELS TOOL

White Point Dropper

This lets you make anything a pure white. It's also is used to correct underexposure.

Go to the LEVELS adjustment either by IMAGE > ADJUSTMENTS > LEVELS or simply command + L. Look for a white eyedropper on the lower right of the adjustment panel. Click it. Now hover over your image and click on whatever part is supposed to be white. Voila! Photoshop makes it white.

This is a powerful tool so be careful. Click on something that is supposed to be blue and it turns everything red trying to make blue look white. Set your eyedropper sample size to 5 x 5 pixels to make this easier to use. You set this by clicking the eyedropper tin the tool pallet on the left first.

Gray Eyedropper

As above, Photoshop will adjust anything clicked with this dropper to be neutral gray. The gray dropper is between the white and black droppers. Be careful! Used properly it makes it easy to correct a discolored image. Used like a bonehead it makes things really nasty.

Everytime you click it you'll get a different result depending on where you clicked. Be careful to select something that really is supposed to be neutral, since a pixel of sky will turn everything red, for example. You can keep clicking the dropper around till you get the look you want. Also try to have the dropper sample size set under the eyedropper tool before you go into the levels tool to 5 x 5 pixels. Otherwise the adjustment is too sensitive and gets distracted by noise.

Black Dropper

Have hazy smoke or something you want to look black? Use the black dropper the same way. The black dropper is to the left of the other droppers.

How to Change the White Balance of an Existing Image (click)

Sharpening   

Do this as the last step after you've sized your image for its final use. Look at your image at 100% on your monitor. Use FILTER > SHARPEN > UNSHARP MASK. Try a radius of 0.3 pixels. The default radius of 1.0 pixel tends to give sloppy results with amateur-looking halos around everything. Try setting the threshold to 3 if you have a film image or an image from a digital point and-shoot, and a threshold of 0 if the image is from a digital SLR camera. Try a percentage of sharpening that looks right. Usually around 150% looks good at a radius setting of 0.3 pixels.

Perfectly Level Horizons and Perfectly Vertical Verticals   

I used to rotate the image by trial and error until I discovered how to get the exact rotation automatically.

Today the best way to fix this is with the lens correction tool in Photoshop CS2 just described above. You can do it for free along with correcting convergence. To correct rotation just select the angle tool on the upper left and drag it along something you need either vertical or horizontal. Easy!

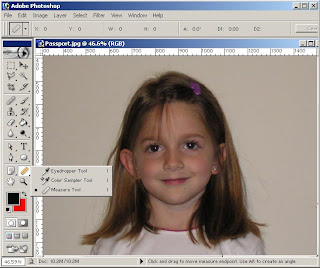
In Photoshop CS and earlier use the "Measure" tool. Find it by clicking and holding the Eyedropper tool and dropping down to the Measure tool. I also get to this faster by pressing "I" three times which cycles through the Eyedropper, Color Sampler and Measure tools, presuming you've unchecked "use shift key for tool changes" in Photoshop's general preferences.

Click, drag and release the Measure tool from one side to the other of anything you want to be perfectly vertical or horizontal. For added precision do this at a large magnification and Photoshop will automatically scroll the image for you.

Now go to IMAGE > ROTATE CANVAS > ARBITRARY and, oh my golly, the exact image rotation is calculated and entered in the box for you! Just click OK or hit "Return" and you're done.

Well, not quite. Now that you have your image rotated a little bit you will want to use the Crop tool (just press "C" or select it from the tool palette on the upper left) to crop the image in enough to eliminate the crooked edges.

This does not correct everything if you have converging lines or lens distortions. That's why I love Photoshop CS2's Lens Correction tool.

Removing Dust and Scratches   

Photoshop CS2 quietly added a "Spot Healing Brush Tool" which makes this really easy. Select it in the tools pallet on the left and click around on your image. It magically fixes most every single blemish you click.

Before this tool some tried to use the Dust and Scratches filter on the entire image. Others like me used the rubber stamp tool, which was primitive because we also always had to go select source sample areas manually.

The dust filter usually softens the whole image and still misses the biggest chunks of dirt. This trick below for earlier Photoshop versions solves both problems, and it's faster than using the rubber stamp tool. With this trick we apply a much heavier dirt filter to cover even the big chunks, but we only apply it to the dirty parts of the image so it doesn't affect the sharpness or small details.

1.) Make a duplicate layer of your original. (Drag the BACKGROUND layer over the new layer icon on the bottom of the layers pallet.)

2.) Unclick the eyeball next to the top layer and select the bottom layer. This way we can see what we're going to do to the bottom layer.

3.) Apply a heavy dust and scratch filter to the bottom layer. (FILTER > NOISE > DUST AND SCRATCHES.) Don't worry about losing detail, just make sure it's set strong enough to cover the biggest defects.

4.) Reclick the eyeball next to the top layer and select the top layer. Your image now looks like it did to start.

5.) Use the eraser tool to cut through the sharp top layer to expose the filtered layer below in the spots with dirt. A more advanced way to do the same thing is to use a layer mask.

This way you can spot out the dirt quickly and not affect anything else. The new Spot Healing Brush pretty much does this by magic, BRAVO!

Brightening Dark Shadows   

As of Photoshop CS this is easy. In Photoshop 7 and before it was very difficult and required masking or advanced plugins from places like ASF.

Today all you do is go to IMAGE > ADJUSTMENTS > SHADOW/HIGHLIGHT and move the top slider to the right.

Tip: reset the defaults to have the amount at 0 each time you call up this adjustment. I have Tonal Width set to 50% and Radius set to 30 pixels most of the time.

I rarely play with the highlights. On a digital capture if you blew out the highlights you're dead; trash the image for good.

Make a new Layer

LAYER > NEW > LAYER. In the box that pops up:

Name the layer something like GRAD and set MODE drop-down to SOFT LIGHT. Click OK.

Your new layer should be highlighted in the layers pallet on your lower right, and it should be transparent. Photoshop shows transparency as a gray checkerboard.

Create a black-to-transparent gradient from top to horizon in the new layer

Select GRADIENT TOOL from the tools palette on the upper left. The Grad tool is halfway down the right side of the tools pallet and is shared with the Paint Bucket Tool. You might have to click and hold the Paint Bucket to get the grad tool.

Be sure you have the default foreground and background colors, black and white, chosen. These colors are seen as the two overlapping color squares towards the bottom of the tools palette. You can reset them to default black and white by pressing the tiny little black-and-white pair of overlapping squares next to them, or just press "D" on your keyboard.

Make sure the "linear" option is selected as the first of five little icons on the top middle left of the gradient tool option bar across the top of your screen. Hover over it and you'll see it say "linear gradient."

Select the black-to-transparent grad. Do this by clicking the little arrow to the right of the grad seen at the top left of the top tool options bar. An illustrated menu of grads will drop down. Choose the one that goes from black to transparent (gray checkerboard).

Put your mouse at the top of the image. Click, hold and drag it straight down till you reach the horizon. Release it at the horizon. You can ensure that this is straight by also holding the Shift key while you do this.

You now should see a little dark-topped grad in the layers palette., and even better, the clouds should have gotten dark and scary looking at the top of your image. The brightest parts at the top should have stayed bright. This is a handy effect all by itself.

Create an Adjustment Layer between the two existing layers

Click on the Background layer in the layers palette. It will highlight in blue.

Click and hold the black/white circle at the bottom of the layers palette.

Choose Selective Color from the drop down menu. Release your mouse.

Choose Cyans at the top. Then set the Cyan slider to 100% and the Magenta slider to 100%. Don't click OK yet.

Choose Blues at the top. Then set the Cyan slider to 100%, the Magenta slider to 100%. Click OK.

You can fool around with the selective color settings to your heart's content. Just double click the black/white circle on the left of the middle blue highlighted layer in the layers palette. and choose different values for the sliders under Cyans and Blues. 60% are also good values. Leave the black sliders at zero. Also try about 25% for the yellow slider under Blues.

Feel free to make a layer mask to prevent the effect from working elsewhere in your image.

I'm sure you also can get the same effect with Nic Color EFX with a lot less effort. See my plug-ins info here.

Adding your Copyright Notice   

Basics

1.) Use the TYPE tool. That's the big "T" in the tools pallet on the left. You get the © symbol by pressing OPTION + G on your Mac. I use 10, 11 or 12 pt type at 72DPI with a drop shadow to bring it forward against even light backgrounds. Use the MOVE tool to drag it where you want it.

1a.) Heaven help you if you're on windows, since it's a royal pain to get the © symbol on a windows computer, another reason professionals use Apple. On PC I usually just fudge with (c) instead of ©. To make the © symbol on a PC, hold down the ALT key and press 0169 on the numeric keypad on the right of the keyboard, NOT the numbers along the top of the keyboard. If you are on a laptop you are really in trouble since you have no separate numeric keypad and have to use the NUMLOCK command! You first

a.) need to put the laptop into NUMLOCK mode (another screwy two-finger function key) and then

b.) hold down ALT and

c.) type 0169, but you have to type 0169 NOT on the regular numeric keys along the top row, but the

d.) letter keys specially marked with teeny numbers that correspond to the numbers in NUMLOCK mode.

e.) After typing all that remember to take the laptop out of NUMLOCK mode or all your other typing will be messed up! Now do you see why we all use Apple computers?

Because of all this most people stuck on windows simply copy and paste a good © symbol from some other document!

Another way to find the © on Windows is to:

Start > All Programs > Accessories > System Tools > Character Map.

(or)

Start > Run, type "Charmap" and hit enter. The next time, just hit Run > enter. You also could create a desktop shortcut to Charmap.

In Character Map select the character you need in the font of your choice. The copyright symbol is only one of thousands of potential characters.

One Click

Once you've learned the above, you'll want to be able to do this with a single click each time instead of typing. Especially for the PC, you can save having to do gymnastics to get the © symbol each time and set up the drop shadow and text properties. In PhotoShop we call these recordings "actions," thus

1.) First be sure your image is sized for final use. If not, the type will come out the wrong size. Set the resolution under IMAGE > IMAGE SIZE. For web and email set the resolution to 72DPI, otherwise, just be sure the image's resolution is set to whatever its final value will be.

2.) Find the ACTIONS palette.

3.) Click the right arrow to the right on the top of the actions palette which calls out a menu, on which you

4.) Click NEW ACTION, name it something, and hit RECORD. (You'll see a red light at the bottom of the actions palette light up to let you know you're recording.)

5.) Do all the typing and font selection and drop shadowing to your taste.

6.) Stop the recording by hitting the black square ("stop") button to the left of the red one at the bottom of the actions palette and you're done. Tip: even many experienced people get distracted in the middle of this and do a day's work without remembering to hit the "stop" button. This winds up recording everything you did that day as the action! In this case, hit stop, delete that recording by highlighting it in the actions palette and dragging it to the trash icon at the bottom of the actions palette. Another tip: when recording an action place the text in the middle of the image. Since images tend to be different sizes and shapes you usually will want to drag (use the MOVE tool) your text manually to the best location each time.

7.) To play this back next time, just select the action you recorded in the actions palette and click the triangular "play" button at the bottom of the actions palette. You'll get your © notice immediately. Now just use the MOVE tool to drag the text where it looks best.

Also see any book or class or help section of PhotoShop to learn how to do these actions.

Auto-Magic Positioning

Instead of moving the the copyright notice on every image, you can make the text automatically align to any specific spot (like the bottom-right corner) no matter the size or dimension of the image.

1. Once you've created the text and styles, choose Select -> All.

2. Make sure the text layer is active. Choose Layer -> Align Layers to Selection, then choose the appropriate location. Use combinations for corners, like Bottom Edges and Right Edges. Deselect the selection.

3. The text will usually will be too close to the edges at this point, so to move the text and maintain a universally applicable action, use the Transform tool to move the text. Make sure the text layer is active. Choose Select -> Transform Selection and use the directional arrows on the keyboard to nudge the text away from the edges. The action will remember how many spaces the text was move in the transformation. Click the check mark to set the transformation.

4. At this point one usually merges the layers together. If you want the ability to fine tune you can stop recording the action before merging.

You can make a couple actions for the different sides of the image like on for the bottom-right and one for the bottom-left.

how to use photo shop

INTRODUCTION

Photoshop's Variations and Free Alternatives

I have a different page that explains what Photoshop is, what the versions are and less expensive, or free, alternatives, here. I also talk about all the other software I use and photoshop plug-ins there.

I've been using Photoshop every day for years so its cost is negligible for what I get out of it. If I was starting from scratch and didn't have $560 for Photoshop CS or didn't get Photoshop elements for free with a scanner I'd first try iPhoto that comes for free with every Apple Mac computer, or Google's free Picasa 2 for windows, and learn those. iPhoto and maybe the others even read RAW files, so don't ignore them.

How to Learn Photoshop

A huge advantage of Photoshop is you have more ways to learn it, like this page here, than any other program. So many people know it it's easy to learn just about anywhere.

The best way to learn Photoshop is to take a class at your local community college to learn the basics of Lightening Underexposed Images and Correcting Color Casts and White Balance Problems. These basic adjustments are covered in every introductory Photoshop class and book so I'll just cover them quickly below. You must be fluent in these to get anywhere with Photoshop for optimizing images.

Photoshop also has built-in help as well as free tutorial usually included in the box. All you need to do is choose how you learn best and go that way. Personally I learn best from an in-person class or having an expert show me in person. When I have a question about how to find some obscure tool or how to make a command work I just choose help from the HELP menu.

Basic Operation and Tricks of the Trade

All these adjustments work with every kind of image. That's why skilled photographers feel sorry for people who toil away with RAW files just so they can correct exposure and white balance later. You can do it all to any JPG image in Photoshop without all the hassle.

The tricks below presume you have at least a basic navigational familiarity with Photoshop. You can get that from any book or community college class, or even the built-in help!

Photoshop has been around since the 1980s when it was only used by professionals. It therefore uses terms from traditional professional photography and the commercial printing press trades. Often these terms are exactly the opposite of what you'd expect! The most obviously labeled tools are sometimes the worst way to do things, so read up below.

People spend entire careers learning Photoshop. There is more to learn than any single human will be able to master. Each of us learns what's relevant to our own work.


Workspace overview


Workspace overview

You create and manipulate your documents and files using various elements such as panels, bars, and windows. Any arrangement of these elements is called a workspace. When you first start an Adobe Creative Suite component, you see the default workspace, which you can customize for the tasks you perform there. For instance, you can create one workspace for editing and another for viewing, save them, and switch between them as you work.
 You can restore the default workspace at any time by choosing the default option on the Window > Workspace menu.
Although default workspaces vary across Flash, Illustrator, InCopy, InDesign, and Photoshop, you manipulate the elements much the same way in all of them. The Photoshop default workspace is typical:
The menu bar across the top organizes commands under menus.

The Tools panel (called the Tools palette in Photoshop) contains tools for creating and editing images, artwork, page elements, and so on. Related tools are grouped together.

The Control panel (called the options bar in Photoshop) displays options for the currently selected tool. (Flash has no Control panel.)

The Document window (called the Stage in Flash) displays the file you’re working on.

Panels (called palettes in Photoshop) help you monitor and modify your work. Examples include the Timeline in Flash and the Layers palette in Photoshop. Certain panels are displayed by default, but you can add any panel by selecting it from the Window menu. Many panels have menus with panel-specific options. Panels can be grouped, stacked, or docked.

View full size graphic

Default Photoshop workspace


A. Document window
B. Dock of panels collapsed to icons
C. Panel title bar
D. Menu bar
E. Options bar
F. Tools palette
G. Collapse To Icons button
H. Three palette (panel) groups in vertical dock


Default Photoshop workspace

A.
Document window

B.
Dock of panels collapsed to icons

C.
Panel title bar

D.
Menu bar

E.
Options bar

F.
Tools palette

G.
Collapse To Icons button

H.
Three palette (panel) groups in vertical dock


Hide or show all panels

  • (Illustrator, InCopy, InDesign, Photoshop) To hide or show all panels, including the Tools panel and options bar or Control panel, press Tab. 
  • (Illustrator, InCopy, InDesign, Photoshop) To hide or show all panels except the Tools panel and options bar or Control panel, press Shift+Tab.                                                                     You can temporarily display panels hidden by these techniques by moving the pointer to the edge of the application window (Windows) or to the edge of the monitor (Mac OS) and hovering over the strip that appears. 
  • (Flash) To hide or show all panels, press F4.                                                  
Display panel menu options

  Position the pointer on the panel menu icon  in the upper-right corner of the panel, and press the mouse button.

(Illustrator) Adjust panel brightness

In User Interface preferences, move the Brightness slider. This control affects all panels, including the Control panel.

Reconfigure the Tools panel 

You can display the tools in the Tools panel in a single column, or side by side in two columns.

In InDesign, you also can switch from single-column to double-column display by setting an option in Interface preferences.
  Click the double arrow at the top of the Tools panel.